
News


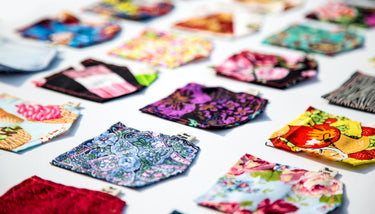


As romantic and antique shaped furniture boom in popularity, we've seen an increase in customers looking to utilise foam for a modern, comfortable twist on the trend.
In this post, we'll cover:
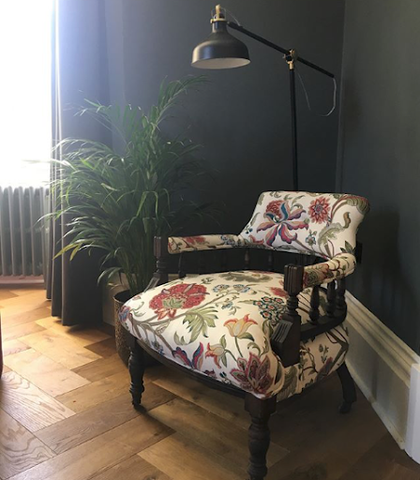
A beautifully re-upholstered project by @theidlehands.
Unlike traditional stuffing such as horsehair, which you continually manipulate to fit a curved edge or unusual shape, you must carefully cut foam to achieve a professional look.
Despite this challenge and the digression from traditional techniques, which may be enough of a turn off for some, using a mix of upholstery foam and wool or synthetic filling has a plethora of benefits.
The foam you choose will transform the way you piece looks and feels. A softer foam can achieve a warmer, homely feel with use. Meanwhile, a firm foam can be used to produce functional but soft supports and bolsters for a dramatic upholstery effect.
Two metrics tend to define the types of foam available on the market:
The Indentation Force-Deflection measures the compression rating of foam, more commonly referred to as IDF.
The density of the foam indicates its quality and longevity. A high-density product will last longer than a low-density product.
Combining these two measurements will help you choose the perfect foam for your product. In case you were wondering, colour does not matter when it comes to foam. Speak to our experts for more guidance on selecting the right kind of filling.
In cases where a product needs to be long-lasting, but also lightweight, or self-supporting but soft to the touch, you can use a combination of foam. But we'll cover this in the professional touches at the end of the blog, so keep reading.

A timeless upholstered chair.
Shaping foam for projects such as cushions, bumpers, footrests, and bucket seats can be daunting. But fixing the upholstery on a curved sofa can be immensely rewarding. Novices may rely on fabric tension to shape softer foam, but this can lead to uneven curves, puckered fabric, or even hard edges -- a dead giveaway of a DIY job.
1. Measure your foam
Begin by measuring your project.
If you are replacing foam: measure the fabric casing from just inside the seams, not the existing foam, to get the correct size. Unless it is a relatively new piece, do not measure the existing foam as it will have shrunk over time with use.
If you are working on a new project: take the measurements from your pattern. If you don't have a pattern, break your project down into easy to manage shapes and ensure you measure twice from the widest parts of each shape.
For continuous edges, measure and order a single piece of foam to fit the entire perimeter. Sewing or sticking foam together can create inconsistencies where the edge joins creating divots.
If you must connect two foam pieces, ensure they are the same material, brand, density and compression. Use foam glue to glue them together before shaping. Do not sew or staple them together as again; this can create inconsistencies.
2. Draw and mark your foam
Foam arrives in rectangular blocks or sheets. At Millshop we can cut your foam to the approximate size for you. Begin by marking where you will be cutting your foam. Mark the outside edges and the highest point of the foam.
Ensure you've measured the correct size for your fabric, as shaving ½ inch off is harder than you might think. However, the foam does compress over time, so don't undercut to allow for this.
Connect your edge marking with the deepest point using a marker. For a consistent curve, use a piece of string attached to a pen. Hold the string at the centre of the curve and draw from one corner to the other.
3. Cut large shapes from your foam
You can cut upholstery foam at home with a range of household items. Professionals often use specialised foam cutters or power tools such as an electric foam saw to make the job quicker. For those who are in a pinch, or like to use what they have around, here are some options:
If your project has a high curvature, it's best to start by removing a large surface area at once. Mark a straight line that meets the highest point of the curve to remove the most volume in one cut.
Make more substantial cuts using an electric foam saw, bread knife, razor blade, or scissors.
4. Cut the final foam curve
Once you've removed the larger surface area, you can focus on creating a smooth and consistent edge.
Starting at the marked edge, use a knife, razor blade, or scissors to cut away and create a smooth edge.
Follow these cut ends to create a consistent curve along the entire edge. Frequently stop cutting and bring your eye down to the project to ensure the edge is consistent.
This process is similar for both firm and soft foams, but there are a few considerations to keep in mind.
Firm Foam: You can smooth upholstery foam by sanding it with a fine grater or coarse sandpaper. The gradual breakdown will produce a precise, smooth finish.
Soft foam: Soft foam is more privy to mistakes. Use a sharp blade and work carefully to avoid any holes or rips in the foam that will impact its integrity later.
When cutting the foam, apply as little pressure as possible to not compress your foam and end up with a misshaped end product. You can achieve this by repeatedly 'scoring' the foam with a bread knife until you cut all the way through.
The 'Crown' of upholstery
The crown of a cushion or soft furnishing is the slight peak at the center of what may be considered a 'flat' object. You can achieve a crown effect by adding an inch to the depth of your foam. Take your larger foam piece and then gently taper the inch away from the outer 50% of the shape.
Layering upholstery foam
When choosing foam, the density indicates it's durability, but a high density can lead to a heavy, warm feel. For light, breathable softness glue a layer a Dacron or batting around the foam to finish it before it goes into your fabric cover. Again, use spray glue, rather than staples or tacking stitches, to achieve a smooth, professional finish.

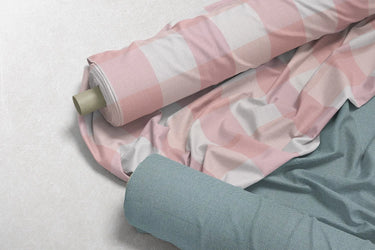
Properly selected and cut foam elevates any upholstery project. But no cushion or chair is complete without the perfect upholstery fabric. Browse our beautiful range of high-quality fabrics to complete your showcase project.
We hope you now feel like an expert when it comes to upholstery and furniture foam and fillings. At Millshop we stock high-quality fabric and fillings UK and international delivery.
For any additional information or a consultation on your specific requirements, contact us on our contact page or email us.


